Well, It’s been quite some time since I wrote Part 1. I wanted to focus on different topics and then come back to certificates but Christmas holidays came and also I’ve been involved in few interesting and quite demanding projects and could not dedicate much on vCenter Self-Signed Certificates Part 2. Although I wrote most of the”painful” portion of the process, I still think that Microsoft CA way requires proper attention.In this part should to be much shorter than Part 1 but let’s see how it goes.
So first things first. To go ahead in process we will need to go through couple of steps :
- Creating the OpenSSL configuration files
- Creating the certificate requests
- Obtaining the certificates
- Implementing the certificates
Looks familiar, isn’t it ? Some of those steps we have done in Part 1, and of course we going to reuse what we already have. Before going ahead let’s make check point of what we need and what we have .
- Version we talk about here is vSphere 5.5
- All components for which you will be installing certificates has been pre-installed
- Microsoft Active Directory Certificate services are running on your Domain Controller or other Server in your environment
- You have reviewed the Key Usage Extensions for the VMwareCertificate (Web Server) template on your Certificate Authority server and made sure it has digitalSignature, keyEncipherment, and dataEncipherment enabled for certificate generation.If you do not have this one, follow this article to set-it up.
- OpenSSL v0.9.8 has been has been installed. I personally would use OpenSSL which come with vCenter “C:\Program Files\VMware\Infrastructure\Inventory Service\bin“. If you’re not sure that it is the version you need, just open it in terminal and write “openssl.exe version”
- You are not using wild card certificates. Each certificate needs to be unique in vSphere 5.x and as a result wild card certificates are not supported.
vCenter has six components components that utilize certificates to encrypt communication.They can be installed on same server or separate server but I’m going to follow “all-in-one” model. Let’s begin, following chronologically steps I wrote few lines above
Creating the OpenSSL configuration files
OpenSSL config file creation is relatively easy. I have decried this in great detail in Part 1 but here I have to highlight specific value which will apply for particular component /service. When you have file created make sure you have specify correct organizationalUnitName. This should be unique for components
| organizationalUnitName | vCenterUniqueServer vCenterInventoryService vCenterSSO vCenterServer vCenterWebClient vCenterLogBrowser VMwareUpdateManager vSphereAutoDeploy |
Creating the certificate requests
Now, since I have configured OpenSSL , I need to generate a certificate request for each component. Folders for all components has been created with component SSL config files .Generation is easy, open Command Prompt get to OpenSSL folder and use bellow commands for each service.
|
1 2 |
<span style="color: #ff6600;">#Certificate request to export the private key <span style="color: #008000;">### Make sure you have proper D:\temp\<<span style="color: #ff0000;">component</span>> directory</span></span> o<span style="color: #000000;">penssl req -new -nodes -out d:\temp\vCenterInventoryService\rui.csr -keyout d:\temp\vCenterInventoryService\rui-orig.key -config d:\temp\vCenterInventoryService\InventoryService.cfg</span> |
|
1 2 |
#<span style="color: #339966;"><span style="color: #ff6600;">Merge key to the proper RSA format</span>###Make sure you have proper D:\temp\<span style="color: #ff0000;"><component></span> directory</span> openssl rsa -in d:\temp\vCenterInventoryService\rui-orig.key -out d:\temp\vCenterInventoryService\rui.key |

Obtaining the certificates
Here comes the interesting part. Steps bellow need to be executed for all services.
Login to your Microsoft CA Web Interface.It should be something like this http://servername/CertSrv

Click “Request Certificate” and then “Advanced Certificate Request”
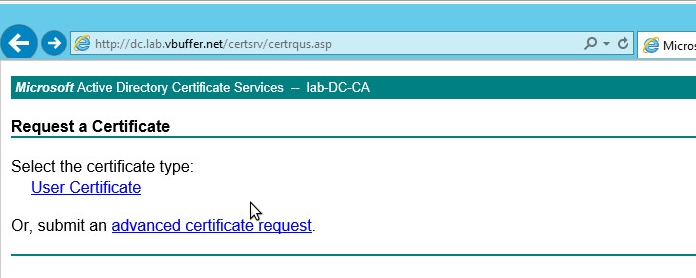
Click here “Submit a `certificate request by using base-64-encoded CMC or PKCS #10 file, or submit a renewal request by using a base-64-encoded PKCS #7”

Open rui.csr, generated in previous steps, in text editor and paste it everything in “Saved Request” .Select “VMware Certificate” certificate template from drop down list or the template you have prepared .Once ready “Submit” it .

Select “Base 64 encoded ” and download certificate .Save it as rui.crt in same directory where rest of files for this service are, in this case D:\temp\<service>
 Before continue we let’s verify certificate key usages . Open rui.crt file go to Details >Key Usage. Do you see digitalSignature,keyEncipherment,and dataEncipherment?
Alright, seems all fine. Let’s go ahead and download certificate chain, so select “Download a CA certificate, certificate chain or CR”
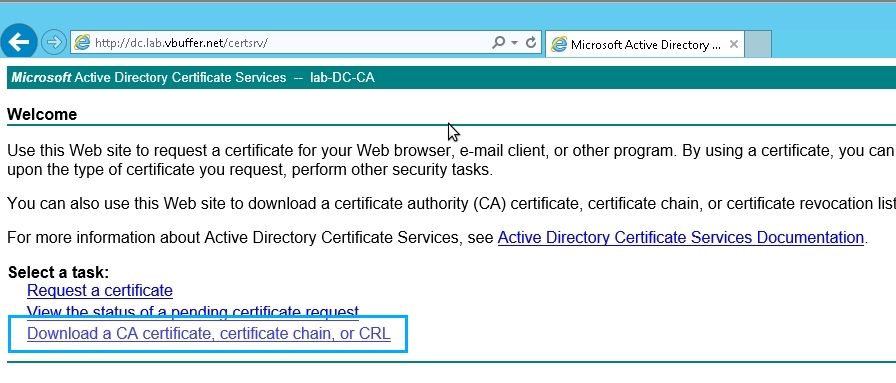
Select “Base 64 ” and “Download CA Certificate chain” and save the file to folder where certificates are D:\temp\

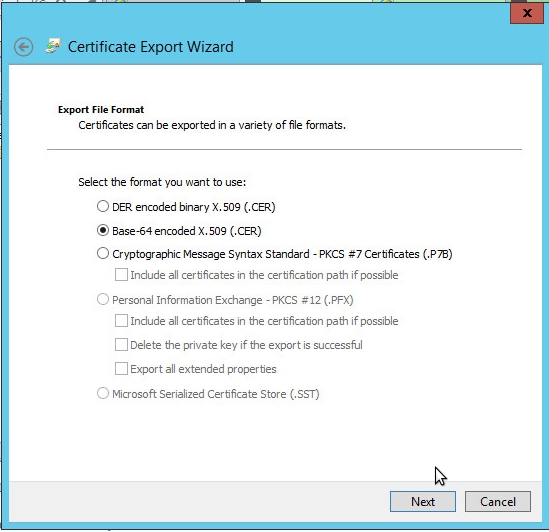
Double click on saved certificate chain and go to “Certificates” and Right-click the certificate listed and click All Actions > Export.

Select Base-64 encoded X.509 (.CER) click “Next” and save file in D:\temp\Root64.cer
So far so good , next step is to generate PKCS#12 PFX for use with each one of the services.Creation is relatively easy and require execution of only one line command in Command Prompt.Make sure you adjust all necessary parameters for each service.
|
1 2 |
<span style="color: #339966;"># Certificate password must be <span style="color: #ff0000;">testpassword</span> .Do not change this parameter </span>openssl pkcs12 -export -in d:\temp\vCenterInventoryService\rui.crt -inkey d:\temp\vCenterInventoryService\rui.key -certfile d:\temp\vCenterInventoryService\Root64.cer -name "rui" -passout pass:testpassword -out d:\temp\vCenterInventoryService\rui.pfx |
|
1 2 |
#<span style="color: #339966;">SSO service is special so following command should do the magic.Don't change certificate store password "<span style="color: #ff0000;">changeme</span>" and the key alias must be "<span style="color: #ff0000;">ssoserver</span>"</span> openssl pkcs12 -export -in d:\temp\sso\rui.crt -inkey d:\temp\sso\rui.key -certfile d:\temp\sso\Root64.cer -name "ssoserver" -passout pass:changeme -out d:\temp\sso\ssoserver.p12 |
If you really want you can check encoding with
openssl pkcs12 -in c:\certs\service\rui.pfx -infoAlright, we have got everything we need for implementing custom Microsft CA certificates. Now if you have your vCenter components on one server you can keep certificates in same folder or wherever you store them, but in case your vCenter components are installed across few servers, copy required files to each server. For the implementation we going to use same tools and steps as in Part 1. Key moment here is to verify sequence by creating a plan for implementation for each service with SSL Automation Tool . Awesome functionality 😀 .
That’s it, pretty much. Path seems not quite short but at least exists and I hope it will save some of your time.
Got a question ? Write it in comments bellow.